Why Your 12V Solar System Feels Bulletproof at First — Then Quietly Falls Apart
There's a certain pride that comes with flipping the switch on a freshly wired 12V solar system. Batteries at 100%, panels gleaming, charge controller blinking green. Everything works exactly the way it should.
Then six months pass.
Something feels off. Your fridge is cycling more than it used to. The battery voltage drops faster after sunset. You're running low by midnight when you used to coast through till morning. Nothing looks obviously broken. No blown fuses, no burnt wires. But something is definitely wrong.
Welcome to the slow decay that nobody warns you about when you're busy buying panels and watching YouTube wiring tutorials.
The Honeymoon Period Is Real — And It Ends
Every new 12V system goes through a honeymoon phase. Fresh connections have zero resistance. New battery cells accept and release charge efficiently. Terminals are clean. Everything is tight.
But the moment you start using the system — charging, discharging, dealing with heat, humidity, vibration from road travel, or just the daily temperature swing between a Texas afternoon and a cool night — the degradation clock starts ticking.
The frustrating part? None of it is dramatic. It's not a single failure. It's a hundred tiny ones happening simultaneously, each one shaving a little performance off the top until one day you realize you're working with half the system you thought you had.
Sulfation: The Battery Killer You Can't See
If your system runs on lead-acid batteries — flooded, AGM, or gel — sulfation is your biggest long-term enemy. It happens when lead sulfate crystals form on the battery plates during discharge and don't fully convert back during charging.
The main trigger? Chronic undercharging. And here's the trap: a lot of off-grid setups are chronically undercharging without the owner knowing it. A few cloudy days, a slightly undersized array, a charge controller that's not quite calibrated right — these all add up to batteries that never quite reach full capacity.
Over weeks and months, those sulfate crystals harden and become permanent. The battery's effective capacity shrinks. You might still read 12.6 volts at rest, which looks healthy, but the battery can no longer deliver the amp-hours it's rated for.
The fix before it gets bad: make sure your system is actually reaching absorption voltage (typically 14.4–14.8V for most lead-acid chemistries) regularly. If you haven't seen those numbers in a while, that's a red flag worth investigating.
Corrosion Creep: The Slow Resistance Tax
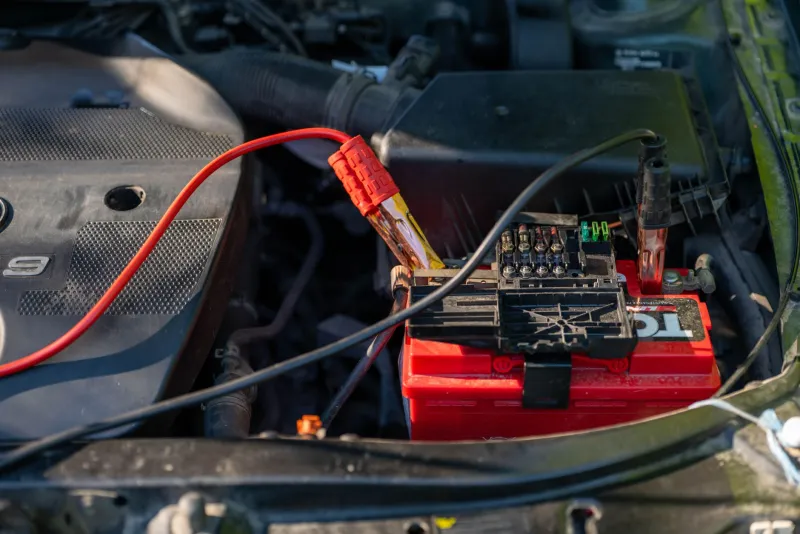
Terminal corrosion is one of those things that looks minor and acts major. A little white or bluish-green crust around a battery terminal doesn't seem like a crisis, but electrically, it's a growing resistor sitting right in your power path.
Resistance means voltage drop. Voltage drop means your charge controller sees less voltage than your panels are actually producing. It means your loads see less power than your batteries are trying to deliver. The whole system underperforms — and the batteries pay the price because they're working harder to compensate.
Corrosion is sneaky because it builds gradually. You're not going to notice it happening. One month it's a light dusting, the next it's a full crust, and by then you've already been losing efficiency for weeks.
Battery terminals aren't the only culprits either. Check every connection in your system: fuse holders, bus bars, the terminals on your charge controller and inverter, wire lugs, ground connections. Any metal-to-metal junction is a potential corrosion point, especially in humid climates or coastal areas.
Connection Degradation: The Problem That Hides in Plain Sight
Vibration is brutal on electrical connections. RV owners know this instinctively — every pothole and highway mile shakes your wiring harness. But even stationary off-grid cabins deal with thermal cycling, where connections expand and contract with temperature changes every single day.
Over time, this works connections loose. A wire lug that was torqued down perfectly at install starts to back off slightly. A crimp that looked solid develops a tiny gap. These micro-loosening events create resistance, and resistance creates heat, and heat accelerates corrosion, and now you've got a compounding problem.
The dangerous version of this is a connection that's loose enough to arc intermittently. Arcing in a 12V DC system is a genuine fire risk that doesn't always trigger a fuse. It can smolder in a wire loom or behind a panel for a long time before it becomes visible.
Your Six-Month Inspection Checklist
The good news is that all of this is preventable with a consistent maintenance routine. Here's what to actually check at the six-month mark — and every six months after that:
Battery Health
- Check resting voltage after a full charge (should hold within spec for your battery type)
- For flooded lead-acid, check electrolyte levels and add distilled water if needed
- Run a load test if you have a battery tester — voltage alone doesn't tell the whole story
- Look for case swelling or heat damage, which signals internal problems
Terminal and Connection Inspection
- Clean any corrosion with a baking soda and water solution, then dry completely
- Apply terminal protector spray or anti-corrosion grease after cleaning
- Check torque on every major connection — battery terminals, inverter lugs, bus bar connections
- Look for discoloration on wires or connectors, which indicates heat from resistance
Charge Controller Check
- Verify your controller is actually reaching absorption and float stages regularly
- Check the temperature compensation sensor if your unit has one
- Review charge history logs if your controller supports them — patterns matter
Panel and Wiring Inspection
- Inspect MC4 connectors for moisture intrusion or cracking
- Check panel frames for corrosion, especially at mounting points
- Look for any chafing on roof penetrations or cable runs
- Verify panel output with a clamp meter on a clear day and compare to expected production
Ground System Verification
- Trace your ground wiring and check every connection
- Look for any ground wires that have come loose from chassis or bus bar
- A bad ground can cause all kinds of mysterious performance issues that are nearly impossible to diagnose without physically checking
Prevention Is Cheaper Than Replacement — Every Time
A set of quality AGM batteries can run $400 to $800 or more. A lithium bank costs even more. Replacing them because sulfation or corrosion destroyed them prematurely is an expensive and entirely avoidable lesson.
The off-grid lifestyle is built on self-reliance, and that means being proactive about the gear that makes it possible. Your 12V system isn't a set-and-forget appliance. It's a living electrical infrastructure that needs periodic attention.
Schedule your six-month check like you'd schedule an oil change. Put it on the calendar. Make it a habit. The systems that keep running for five and ten years aren't the ones built with the most expensive components — they're the ones that got looked after consistently.
Your freedom depends on that power staying on. A couple of hours twice a year is a pretty reasonable price to keep it that way.