Your Existing RV Electrical System Is Probably More Solar-Ready Than You Think
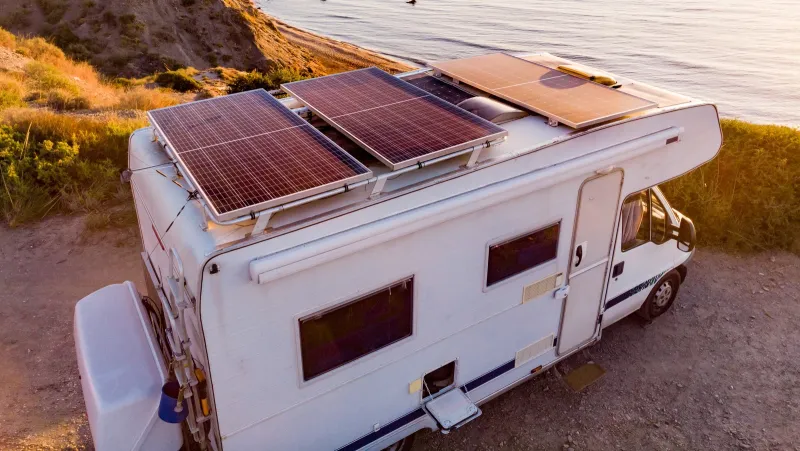
Photo: RV rooftop solar panels installation sunny campsite, via www.slashgear.com
There's a sales pitch making the rounds at RV shows and solar expos across the country, and it goes something like this: your rig's electrical system is outdated, incompatible, and basically a liability. To go solar the right way, you need new wiring, a new battery bank, a new inverter, new everything. Hand over the credit card and let's get started.
Here's the thing — for a huge chunk of RV owners, that pitch is flat-out wrong.
Not maliciously wrong, necessarily. But wrong enough to cost people thousands of dollars on upgrades they didn't need, components they already had in functional form, and overhauls that solved problems they didn't actually have. If you've been putting off solar because the quote felt more like a home renovation than a panel installation, this one's for you.
The "Rip It All Out" Narrative Doesn't Hold Up
Most RVs rolling off lots in the last fifteen years came with a 12-volt DC electrical system already baked in. Converter, battery compartment, 12V lighting circuits, a chassis ground — the bones are there. The question isn't whether your rig has a 12V system. It's whether what's already installed can carry a solar input without blowing up or breaking down.
Spoiler: it usually can, at least partially.
The real job is assessment, not demolition. Before you spend a dime on new gear, spend an afternoon figuring out what you're actually working with. A multimeter, a flashlight, and a notepad will get you further than a shopping cart full of new components.
Start With Your Battery Bank
This is the heart of your 12V system, and it's also where most of the upgrade pressure comes from. Dealers love to push lithium iron phosphate (LiFePO4) batteries, and honestly, they're great — but they're not always necessary right out of the gate.
If your rig currently runs on AGM or flooded lead-acid batteries that are less than three years old and holding a decent charge, they can absolutely serve as a starting point for a basic solar setup. You won't get the same depth of discharge as lithium, but you can still run lights, a fan, and charge devices without touching your battery bank.
Check your batteries with a load tester, not just a voltage meter. Voltage tells you state of charge; load testing tells you whether the battery can actually deliver under demand. If they pass, keep them. If they're toast, then you upgrade — and at that point, yes, lithium starts making a lot of financial sense because you're replacing them anyway.
Your Converter Might Already Be a Charger
Here's one that surprises a lot of people. Many RVs manufactured after 2010 came with a converter/charger combo unit — something like a Progressive Dynamics or Parallax box mounted near your electrical panel. These units not only convert 120V shore power down to 12V DC, they also function as multi-stage battery chargers.
If you have one of these, your solar charge controller can work alongside it without conflict, as long as you're not running both simultaneously at max output into a small battery bank. In most real-world scenarios, you won't be. Solar charges during the day; shore power charges when you're plugged in. They're taking turns, not fighting.
Check your converter model number online before assuming you need a new one. You might already have a three-stage charger sitting in your rig that nobody told you about.
Wiring: Where the Real Compatibility Questions Live
Okay, here's where things get a little more nuanced. Wiring is the one area where you genuinely can't cut corners, and it's also where older rigs sometimes do need attention.
The main concerns are wire gauge and fusing. Solar panels can push meaningful current through your system, and undersized wire is a fire hazard — full stop. Before you mount a single panel, trace the wire runs from your proposed charge controller location back to your battery bank and check the gauge. For a modest 200-400 watt system, you're typically looking at 10 AWG minimum for shorter runs, with 8 AWG or 6 AWG as you add panels or extend distances.
If your existing wiring runs are sized appropriately and the insulation isn't cracked or corroded, there's often no reason to replace them. Add a proper fuse or breaker near the battery, make sure your connections are clean and tight, and you're in good shape.
What does sometimes need replacing: the main battery cables, especially on older rigs where corrosion has crept under the insulation. These are cheap and easy to swap out yourself.
The Charge Controller Question
If your rig didn't come with a solar prep package, you'll need a charge controller — this is one component you're almost certainly adding new. But that doesn't mean you need a $300 MPPT unit on a starter setup.
For a simple two-panel, one-battery-bank system on a weekend warrior rig, a quality PWM controller from a reputable brand will do the job without drama. The upgrade path to MPPT makes more sense when your panel array grows, your battery bank gets larger, or you're dealing with long wire runs where voltage drop becomes a real factor.
Buy what fits your current setup. You can always upgrade the controller later — it's one of the cheaper and easier swaps in a 12V solar system.
Roof Penetrations and Mounting: Don't Overthink It
One more area where the "start from scratch" crowd tends to oversell complexity. Getting panels on your roof doesn't require a structural overhaul. Flush-mounted racking systems are straightforward, and plenty of RV owners have done clean, weather-tight installs with a handful of Z-brackets, self-leveling lap sealant, and a weekend afternoon.
The key is sealing properly and avoiding penetrations near seams or vents when you can. If you're nervous about it, a mobile RV tech can often handle a basic roof mount for a few hundred dollars — far less than a full system overhaul.
What Actually Justifies a Full Overhaul
To be fair, there are situations where a ground-up rebuild makes sense. If your battery bank is ancient and sulfated, your wiring is a rat's nest of mismatched gauges and sketchy splices, and your converter is a 1990s single-stage unit that boils your batteries — yeah, starting fresh might be the cleaner move.
But that's not most rigs. Most RVs on the road today have serviceable electrical systems that need additions, not replacements. A charge controller, some panels, proper fusing, and clean connections will get the majority of owners to a functional solar setup without blowing their travel budget.
The Bottom Line
Before you let anyone talk you into a five-figure electrical overhaul, do your own homework. Grab a multimeter, pull out your converter manual, load-test your batteries, and check your wire gauges. Chances are you'll find a system that's more capable than you've been led to believe.
Solar is supposed to give you freedom — freedom from hookups, from generator noise, from campsite fees. It shouldn't cost you so much upfront that you can't afford to actually go anywhere. Start with what you have, add what you need, and upgrade from there. That's how smart off-grid power actually works.